Monday, August 30, 2010

Hello Chinese Almond Cookies - take two (or three)


This is an 'encore' presentation of a Chinese Almond Cookie production.

Don't you love it when television networks trumpet a 'special event' or 'encore' of a show that was just on the other day? It's a REPEAT, for cryin' out loud!  And if it was any good the first time, I would have watched it then, and not waited for a repeat.

But this is different.... I make these cookies all the time and they are guaranteed delicious.  I just want everyone to know about them and maybe try the recipe at least once.  And this time, I've taken some (hopefully) nicer photos. All the better to tempt you with...  *cackle* *cackle*

Chinese Almond Cookies
Makes about 50

Ingredients
2 ½ cups plain flour
½ cup almond meal
1 cup sugar
1 tsp baking soda
½ teaspoon salt
1 cup (250g) unsalted butter, softened
1 egg
1 tsp almond extract
½ cup flaked almonds for decoration
1 egg, beaten, for egg wash

Method
1. Sift flour, almond meal, sugar, baking soda and salt into a bowl and set aside.
2. Use an electric mixer to cream the butter until smooth.
3. Add the egg and almond extract, and mix until combined.
4. Add the flour mixture and mix on low speed until just combined.
5. Turn out the dough onto a piece of plastic wrap and form into a disk. Cover dough and refrigerate for 20 minutes until firm.
6. Preheat oven to 325 deg F (165 deg C). Line baking sheets with paper.
7. Roll dough into 1 inch balls and place on baking sheet about 1 inch apart. Flatten balls slightly with palm of your hand.
8. Place a sliced almond in the centre of each cookie. Brush top of cookie with beaten egg..
9. Bake for 12-15 minutes (rotate baking sheets halfway through). The cookies should be light golden on top.
10. Cool the cookies on the baking sheets for a few minutes before transferring to wire racks to cool completely.

Store the cookies in an airtight container for up to 1 week.

Ingredients, including almond meal and flaked almonds for decoration. 
This time, I also used raw caster sugar (the light brown stuff) that I picked up at the Good Food and Wine Show.
No discernible difference to the taste, but it seems healthier...

The mixed dough is wrapped in plastic and chilled for 20 minutes. Then it's rolled into balls and brushed with beaten egg, then baked.

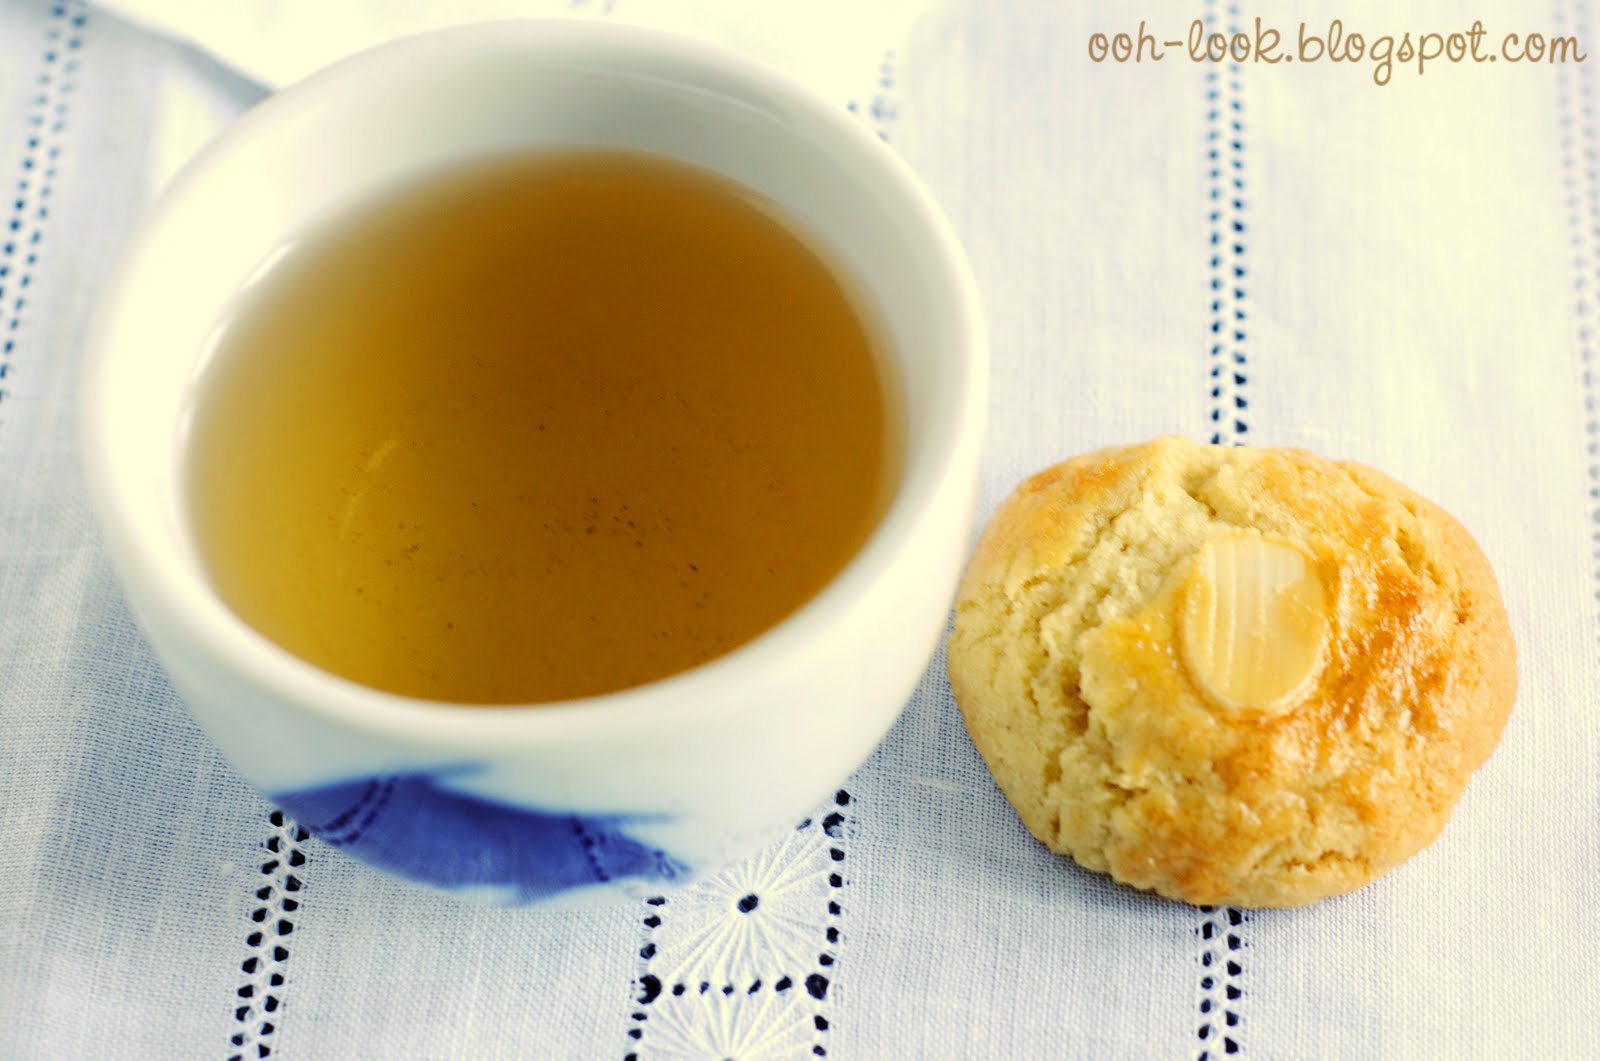
A plate of cookies served with a cup of jasmine tea is perfect.

Now can you understand why these are (one of) my favourite cookies?

Maybe you need to try them to find out  =)

Wednesday, August 25, 2010

Vegetating mini meatloaves


How's this for a school night meal idea?
These little meatloaves will cook quickly (no need to wait and hour for a large loaf to cook through), are tasty, and have vegetables hidden in them.
There are no school children in my household, just grown-ups with sometimes simple tastes and foibles ("urgh, but I don't like beetroot...", "oh, not salad again, why can't we have sausages?").
This is a great compromise that can be dressed up to give the impression of sophistication - just add a perfect spinach leaf and a dish of sauce on the side. And if there are any leftovers, pop them in the lunchbox the next day.

Mini Meatloaves
serves 4

Ingredients
• 2 small carrots, peeled
• 1 small zucchini
• 500g lean beef mince
• 1/2 cup breadcrumbs (fresh or dried)
• 1/2 small brown onion, finely chopped
• 1 tsp Worcestershire sauce
• 2 tbs tomato paste
• 1 egg, lightly beaten
• tomato sauce, to serve


Method
1. Preheat oven to 210°C.
2. Coarsely grate the carrots and zucchini. Use your hands to squeeze out as much liquid as possible. Place the carrot and zucchini in a large bowl. Add the beef mince, breadcrumbs, onion, Worcestershire sauce, tomato paste and egg, and mix until well combined.
3. Lightly grease (with olive oil spray) a 12-hole medium (1/2 cup) muffin pan.  Divide the mixture evenly among the muffin pans, pressing it firmly into each pan and smoothing the tops.
4. Bake in the preheated oven for 20 minutes or until golden on top and cooked through. Remove from the pans and serve with some salad (if you're brave) and tomato sauce.

To freeze, wrap each cooked meatloaf in plastic wrap, seal in a freezer bag and freeze for up to 3 months. To reheat, unwrap the frozen meatloaves and place on a baking tray in an oven preheated to 180°C for 18 minutes or until heated through.

Recipe adapted from taste.com.au
Ingredients, including a flavoursome dash of Worcestershire sauce

Even if you have someone with childish tastes, it's no reason to be juvenile in food presentation - serve the meatloaves with grownup grissini sticks and artfully arranged spinach leaves

And lots of tomato sauce, of course.

Monday, August 23, 2010

Cheesecake Swirl Chocolate Brownies - enough said!


I've always wanted to bake an elegant type of tart.  You know, the ones that have a thin, crisp, perfectly uniform shortcrust pastry with a smooth, rich, glossy filling of chocolate. It would be displayed with a slice slightly cut out, with razor sharp edges, and sprinkled with fine Dutch cocoa..

But I've made this 'rustic' cheesecake swirl chocolate brownie instead.
Just because.

Cheesecake swirl chocolate brownie
makes 16

Ingredients
200g dark chocolate
250g butter
1 3/4 cups (300g) brown sugar, lightly packed
4 eggs
1 1/3 cups (300g) plain flour, sifted
1/4 tsp baking powder, sifted
1/3 cup (35g) cocoa, sifted

Cheesecake swirl
250g cream cheese, softened
1/3 cup (75g) caster (superfine) sugar
2 eggs

Method
1.  Preheat oven to 180C/350F.
2.  Place chocolate and butter in a saucepan over low heat, and stir until melted and smooth.  Cool slightly
3.  Place melted chocolate mixture in a bowl with the brown sugar and eggs.  Whisk to combine.
4.  Add the flour, baking powder and cocoa and whisk until smooth.
5.  Pour into a lightly greased 22cm tin lined with non-stick paper.  Set aside.
6.  For the cheesecake swirl: place the cream cheese, caster sugar and eggs into the bowl of a food processor and blend until smooth.  Place large spoonfuls of the cheesecake mixture on top of the chocolate mixture and, using a butter knife, swirl to partially combine.
7.  Bake for 50 minutes or until set.  Cool in the tin before slicing.

Recipe from donna hay magazine

Ingredients, including heaps of butter, sugar, eggs and chocolate

Mixing the chocolate with the flour; blend the cream cheese, caster sugar and eggs in a food process to produce a smooth, gorgeous, lick-the-spoon cream; dollop on the chocolate brownie mix

Made a bit of a mess with this, but was it worth it...?
Yes! It was very worthwhile!

Admittedly, due to lack of a wide cake tin, my brownie looks more like a cake.

Appearances can be deceiving, as this moist, fudgey interior and crisp top attest.

Thursday, August 19, 2010

Quinoa chickpea fritters - or falafels


Recently, I've discovered the joys of quinoa.  Now, I know a lot of you lovely readers are healthy eaters and know all about the benefits of this grain.  Here's a refresher for those (like me) who are new to it.

Quinoa (pronounced KEEN-wah) is a seed that is native to South America. It contains all 9 essential amino acids and it is gluten-free and cholesterol-free.  Of all the wholegrains, quinoa has the most protein, yet it cooks relatively quickly, in 10 to 15 minutes (1 part quinoa to 2 parts water).  Some say to rinse the quinoa before using but I don't do this and it seems fine.

I found my quinoa in the healthfood aisle at the supermarket, and it's called 'Organic Royal Quinoa' and is a 'product of Bolivia'.  Regardless of the health benefits, and that it's quick to cook, is the taste - I wouldn't eat something that tastes average - quinoa has a great chewy-soft texture and lovely nutty flavour. You just need to add some olive oil, salt or lemon juice to make it even better.

These fritters (aka falafels) combine the virtuosity of quinoa, carrot and chickpeas with the tastiness of spices, lemon and garlic. It's served with a tahini sauce to moisten up the fritters a bit. They are a winner even with avowed meat eaters.

 
Quinoa and Chickpea Fritters
serves 4

Ingredients
1/2 cup quinoa
1 cup water
1 large carrot, chopped
3 spring onions, sliced
2 tblsp parsley, chopped
400g chickpeas
2 eggs
2 tblsp lemon juice
1 tsp ground cumin
2 tblsp sesame seeds, lightly toasted
2 cloves garlic
salt and pepper, to taste
1 tblsp olive oil

Tzatziki and Tahini sauce
1 cup tzatziki (or plain yoghurt)
1/4 cup tahini
1 tblsp lemon juice

Method
1. Bring 1 cup of water to the boil in a small saucepan.  Add the quinoa, cover and reduce heat to low. Cook until liquid is absorbed, about 10-15 minutes.  Set aside to cool.
2. In a food processor, blend the carrots and parsley.  Add the spring onion, chickpeas, eggs, lemon juice, cumin, sesame seeds and garlic.  Season with salt and pepper. Blend until combined.  Add the quinoa and pulse until just combined.  Place mixture in the refrigerator to chill for an hour, or overnight.
3.  Heat olive oil in a non-stick frypan over medium heat.  Form the quinoa mixture into small patties, flattening slightly.  Cook for 3 minutes on each side, until golden.
4.  For the tahini sauce: Whisk the sauce ingredients together and season with salt and pepper.
5.  Serve the fritters warm or at room temperature with a dollop of the sauce.

Recipe adapted from sproutedkitchen.com
 
Ingredients, before and after cooking the quinoa.  See how fluffy it becomes.

Form the chilled mixture into fritter shapes, then cook in olive oil until golden

Serve the quinoa and chickpea fritters with tzatziki and tahini sauce.
I hesitate to suggest it, but this is so healthy that it might be okay to pig out on chocolate for dessert...

Tuesday, August 17, 2010

Ottolenghi's Chargrilled Chicken with Mograbiah

Here's something: Mograbiah is also known as pearl couscous, Israeli couscous, berkukis (in North Africa) and fregola (in Sardinia). It is made from durum wheat and is more like a pasta. Talk about versatile.

This is another dish of amazing freshness and complementary flavours from Ottolenghi The Cookbook.  The trivia about mograbiah is from the book, too.  Talk about versatile (and useful)!
The Ottolenghi recipe of this dish uses quail instead of chicken, but the book handily warns about the 'fiddly and unrewarding' nature of deboning spatchcock, and suggests that chicken thigh or leg meat can be substituted - I told you it was useful.
Here is my take on the recipe.

Spiced Chargrilled Chicken with Mograbiah
serves 2

Ingredients
4 chicken thigh fillets

Marinade
1/2 tblsp ground cinnamon
1 tblsp ground cumin
6 whole cardamom pods
1/2 tblsp paprika
pinch of salt
2 cloves garlic, crushed
15g fresh ginger, crushed
1 tblsp honey
90ml olive oil

Salad
1/2 cup mograbiah
5g unsalted butter
1/2 tblsp olive oil
1/2 mild red chilli
1 spring onion
2 tblsp lemon juice
1 tblsp flat-leaf parsley, chopped
1 tblsp mint, chopped
salt and pepper

Method
1.  For the marinade: put all the spices and a pinch of salt in a small food processor bowl (or mortar and pestle) and blend until a fine powder.  Add the garlic and ginger and work into a paste.  Transfer the mixture to a large bowl and whisk in the honey and oil until it becomes light and uniform in texture.  Add the chicken and massage well with the marinade.  Cover and chill for at least 4  hours, preferably overnight.
2.  The next day, prepare the mograbiah: bring a cup of water to the boil with a pinch of salt.  Add the mograbiah and simmer for 10-15 minutes until tender (or 'al dente').  Add the butter and oil, stire well and season with plenty of salt and pepper.  Set aside to cool. Meanwhile, remove the seeds from the chilli and chop it finely.  Finely slice the spring onion and add with the chilli and lemon juice to the cooling mograbiah.
3.  To cook the chicken: place a chargrill pan over medium heat and leave until hot.  Lay the chicken in the pan, spaced well apart, and grill for 10-15 minutes, turning once or twice. Make sure the heat is not too high, or the chicken will darken before they cook.
4.  When the chicken is almost ready, stir the herbs into the mograbiah.  Add more salt, pepper or olive oil to taste.
5.  Pile the salad onto a serving dish, top with the chicken and serve immediately.

Recipe adapted from Ottolenghi The Cookbook

The marinade ingredients. Next time, I would use ground cardamom, as processing the pods does not ground them finely enough

The marinade turns into a paste that is then massaged into the chicken. This is where a pair of disposable kitchen gloves comes in handy!

Preparing the mograbiah (aka pearl couscous). the herbs, chilli and lemon juice add a wonderful freshness to the dish.

Serve the chicken with the mograbiah

Still can't get enough of Ottolenghi's simple genius

Friday, August 13, 2010

What a pretty Strawberry mess


Have you ever had times when you want to come up with an impressive dessert but aren't prepared? Or what you had prepared for just isn't up to scratch (or looks a bit bleah)?
This was one of those times.

Strawberries are particularly fine at the moment - redder and sweeter than they've been for a long time. I had bought a punnet on the spur of the moment, and thought "These will make a much better dessert than that 'other thing' I was going to make".  So I whizzed around the supermarket to pick up some pre-made mini meringues and some low-fat vanilla yoghurt, and ta-dah! Strawberry Mess.

Oh, and the dessert that wasn't up to scratch? I will show you that another time, maybe. It was an apple crumble that tasted alright, but isn't that glamorous in the va-va-voom department. 

Strawberry Mess
serves 2

Ingredients
1/2 a punnet of strawberries (about 5 strawberries per person), washed, hulled and sliced
125g low-fat vanilla yoghurt (or whipped cream flavoured with a few drops of vanilla extract)
6 marshmallows (pink or white), halved
8 mini meringues (store-bought or homemade), crumbled

Method
1. Layer the ingredients attractively in a tall glass.
2. Serve with a flourish

Some of the ingredients, including fluffy marshmallows, crispy meringues and lush strawberries

Layer everything in a glass...

And blush modestly at the compliments.

Monday, August 9, 2010

ad hoc duck that's not despicable


DD: Rabbit season.
BB: Duck season.
DD: Rabbit season.
BB: Rabbit season.
DD: Duck season! Fire!
I could watch that ep of Bugs Bunny and Daffy Duck a million times. Only 5 more watches to go.

I recently picked up a package of Luv-a-duck duck breasts and found this simple recipe in the very heavy (weightwise) cookbook by Thomas Keller, ad hoc at home.  It's a simple recipe because the preparation for the duck can be done earlier in the day, leaving only the cooking to be done later.
And because the book showed the luscious duck breasts reclining on a bed of glossy, buttery vegetables, that's what I made to go with the duck.  The original recipe includes kohlrabi rather than potatoes, but frankly, I wouldn't recognise a kohlrabi if it hit me on the nonce (and the greengrocer didn't have any, anyway).  And the cookbook is right - the vegetables are perfect with the crispy-skinned, moist duck breast.

Pan-Roasted Duck Breasts
serves 2

Ingredients
2 duck breast fillets
1 orange
Balsamic vinegar
2 sprigs of thyme
2 bay leaves
Canola oil
Salt flakes, pepper, to season

Method
1.  Use a sharp knife to cut a 1/4-inch cross-hatch pattern into the duck skin; do not cut into the meat. Place the duck breasts skinside down on a plate, then season with salt and pepper. Finely grate some orange zest over each breast. Sprinkle a few drops of vinegar over each breast, then top with a sprig of thyme and a bay leaf.  Turn the breasts over and season each breast with a pinch of salt.  Refrigerate, uncovered, for at least 1 hour, or up to 12 hours.
2.  Remove duck from the refrigerator.  Blot any moisture from the duck breasts and season both sides of each breast with salt.
3.  Pour some oil into a large frying pan over medium-low heat.  Add the duck breasts skinside down, then cook, moving frequently to promote even browning.  Use a large kitchen spoon to remove any melted duck fat to a metal bowl (store the rendered duck fat in the refrigerator and use for other dishes).  Cook the duck for about 20 minutes, until the skin is very crisp.  Then, turn the breast over and sizzle the flesh-side for 30 seconds.  Transfer the duck breasts to a preheated 200C/400F oven and cook for 5 minutes.
4.  Let the duck breasts rest (skinside down) for 5 minutes before slicing lengthwise and serving.

Butter-braised Vegetables
serves 2

Ingredients
10-12 brussels sprouts
8 medium radishes (1-1 1/2 inches diameter)
4 tblsp butter
1 tblsp minced shallot
1/4 tsp sugar
1/4 tsp red wine vinegar
60ml (1/4 cup) chicken stock
salt and pepper
2 non-floury potatoes, such as desiree

Method
1.  Trim the root ends of the brussels sprouts and remove any tough outer leaves.  Cut sprouts in half through the root end.  Blanch the sprouts in a pot of salted boiling water for 5-7 minutes, until tender.  Rinse under cold water and drain, then place on a tray in the refrigerator to chill.
2.  Trim the green leaves from the radishes, then wash under cold water. Cut the radishes into quarters, or 6 wedges if they are large.
3.  Melt 2 tablespoons of butter over medium heat in a pan.  Add the shallot and cook for 2 to 3 minutes, stirring, until softened.  Add the radishes, sugar and vinegar, season generously with salt and pepper, and add 30ml of the stock.  Bring to a simmer, cover, then simmer gently for 8 minutes, until the radishes are crisp-tender.  Cook a further 4 minutes to glaze the radishes, then set aside.
4.  Peel and cut the potatoes into batons, then cook in a pan of salted boiling water until just tender, about 7 minutes.  Drain thoroughly.
5.  Bring the remaining 30ml of stock to the boil in a large pan, and whisk in the remaining 2 tablespoons of butter until emulsified.  Add the brussels sprouts and potato and cook over high heat for 45 seconds.  Add the radishes and any remaining liquid in the pan and heat through. 
6.  Season the vegetables with salt and pepper and a few drops of vinegar, to taste.  Transfer the vegetables to a platter and serve with the duck.

Recipes adapted from ad hoc at home by Thomas Keller

Lovely fresh vegetables, and prepared duck breasts topped with orange zest, thyme and bay leaf.

After blanching the radishes and brussels sprouts, refresh under cold water to retain their bright colour.
The duck breasts are pan-fried to render the fat - there's lots of fat under the skin - and to crisp up the skin. Cooking the duck this way is also perfect for not overcooking the duck, as it is finished off briefly in the oven.

Serve the sliced duck with the rich, butter-glazed vegetables.

For an ad hoc meal, this is pretty impressive!

Thursday, August 5, 2010

Baked chocolate creams and ginger pears

Faintly blushing, a corella pear lineup

There has been a glut of corella pears at the supermaket lately.  These pears are smaller and prettier than the regular beurre bosc, William or Packham pear, and they have a reddish yellow tinge that indicates when they are perfect to eat.  The pears I've used here are a bit larger than some corellas - have you seen the dessert ones that are the size of a golf ball?

An online search for 'corella pears' unearthed this recipe from Gourmet Traveller.  They recommend serving the dessert with tokay (or 'topaque' as it's now known in Australia) or similar dessert wine.  I'll tell you one thing, though: you do need something giga-dense to counteract the super-sweetness of the pears and the mega-richness of the chocolate cream!

Baked chocolate cream with ginger-poached pears
serves 4

Ingredients
170 g unsalted butter, coarsely chopped
230 g dark chocolate (70% cocoa solids), coarsely chopped
80 ml (1/3 cup) thickened cream
2 eggs, lightly beaten
60 g caster sugar
15 g (2 tbsp) crystallised ginger, finely chopped

Ginger-poached pears
500 g caster sugar
250 ml Stone’s green ginger wine or ginger beer
4 ripe corella pears, halved, cores removed with a melon baller


Method
1.  For ginger-poached pears, combine sugar, wine and 750ml water in a saucepan over medium-high heat, stirring to dissolve sugar. Bring to the boil, reduce heat to very low, add pears, cover closely with baking paper and turn occasionally until tender and translucent (1-1½ hours). Cool in syrup and reserve.

2.  For chocolate creams, preheat oven to 180C. Combine 120g butter and chocolate in a heatproof bowl placed over a saucepan of simmering water. Stir occasionally until melted and smooth (3-5 minutes), remove from heat and cool slightly. Whisk cream, eggs and 20g caster sugar in a separate bowl until just combined, stir in chocolate mixture, then add crystallised ginger. Pour mixture into four 150ml-capacity ovenproof dishes and bake until just set with a slight wobble in the centre (10-12 minutes). Cool to room temperature.

3.  For the ginger caramel syrup: heat a large frying pan over medium-high heat and scatter remaining sugar in an even layer in the base of the pan and cook until starting to caramelise (3-4 minutes). Carefully add pears, cut-side down, and cook until golden (5-6 minutes). Add remaining butter and cook until melted (3-5 minutes). Remove pears with a slotted spoon and keep warm. Add 80ml poaching liquid to pan, stir to combine and simmer over medium heat until syrupy (3-5 minutes). Cool to room temperature.

4.  Serve baked chocolate cream with pears and caramel syrup.

Recipe adapted from Gourmet Traveller

Ingredients, including sugar, eggs, cream, pears, butter, dark chocolate, crystallised ginger and lashings of ginger beer.

Above: Yes, that is a quite a lot of chocolate and butter being melted together; the corella pears are cored using a melon baller; after baking, the chocolate creams resemble unrisen souffles; the pears are cooked in caramel syrup

On their own, the pears are sweet, with a crunchy crust. Together with the chocolate cream, they are a combination of refreshing softness (pears) and rich gooeyness (chocolate)

A final shot of the chocolate cream - it's dark, it's rich, and I may have overcooked it a bit, but it's all mine...

Monday, August 2, 2010

Chargrilled Vegetables like Ottolenghi does it


You wouldn't think a simple dish of chargrilled vegetables could taste any better, but it can.

Yes, Ottolenghi does it again, with this combination of fresh salad leaves, oven-roasted tomatoes, strips of finely sliced zucchini and chargrilled asparagus.  Just add some haloumi cheese and anoint the dish with basil and garlic-scented olive oil, and it's ambrosia on a plate.  How suitably poetic!

The original recipe calls for manouri cheese, a Greek semi-soft, fresh white whey cheese made from goat's or sheep's milk.  Haloumi cheese is a good substitute and is probably easier to find, which is why I've used it here.

Char-grilled Vegetable Salad with Haloumi
serves 2

Ingredients
250g cherry tomatoes, halved
5 tblsp olive oil
sea salt and black pepper
24 asparagus spears
2 medium zucchini (courgettes) 
120g haloumi, sliced
40g rocket or other salad leaves

Basil oil:
75ml olive oil
1 garlic clove, chopped
25g basil leaves
salt and black pepper, to season

Method
1. Preheat the oven to 170C (375F). Spread the tomatoes onto a baking tray lined with parchment paper and mix with three tablespoons of oil and season with salt and pepper. Lay them out, skinside down, on the baking tray and roast for 25-30 minutes, until semi-dried. Set aside to cool.
2. Peel and trim the woody bases from the asparagus and blanch in boiling water for four minutes. Drain, refresh in cold water, drain, then transfer to a bowl and toss with one tablespoon of oil and salt and pepper.
3. Slice the zucchini very thinly lengthwise and mix with a tablespoon of oil, salt and pepper.
4. Place a ridged griddle pan on a high heat and leave for a few minutes until very hot. Grill the zucchini and asparagus, turning after a minute - or until char marks appear. Remove and leave to cool slightly.
5. Add the haloumi to the pan and fry for 2 minutes a side, or until golden. Drain on paper towel.
6. To make the basil oil, mix all the ingredients in a food processor (or in a bowl) until smooth.
7. Arrange the rocket, vegetables and cheese in layers on a flat serving plate - build up the salad while showing all the individual components. Drizzle with basil oil and serve.

Recipe adapted from Ottolenghi The Cookbook

Ingredients, fresh from the garden supermarket

Using a griddle pan will give nice grill marks on the vegetables and cheese

Serve with basil oil
LinkWithin